 for the latest updates.
Home
Programmable Conversations
Users
API Authentication
Sunshine Conversations Connect
References
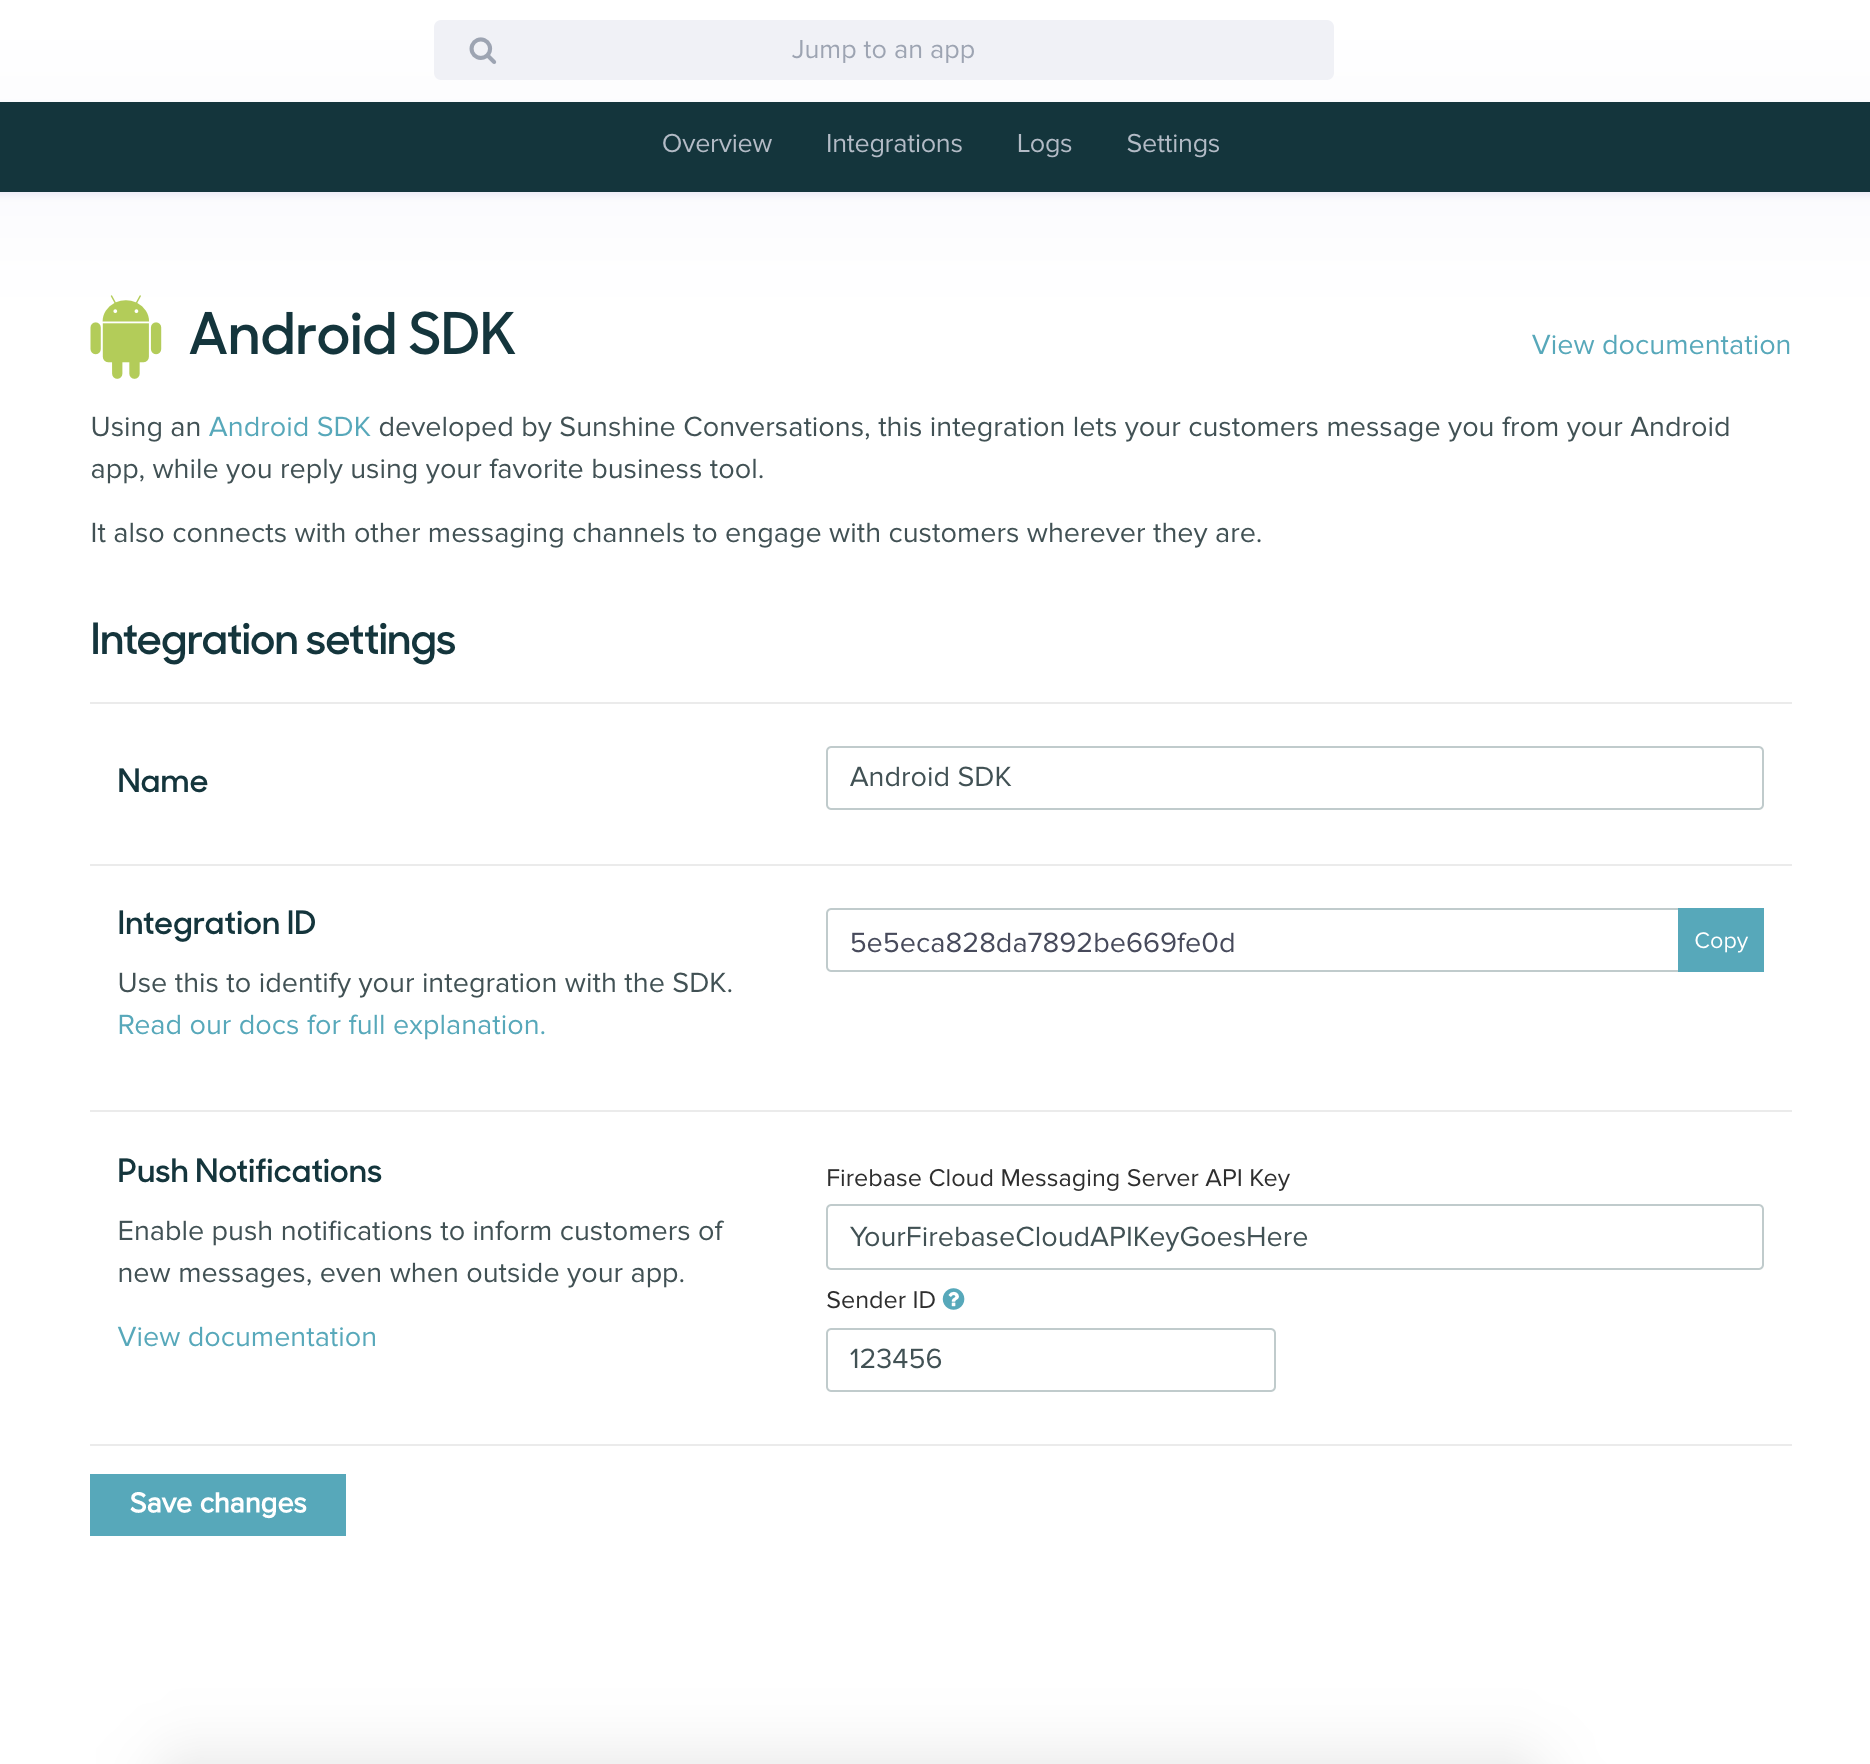
Android SDK
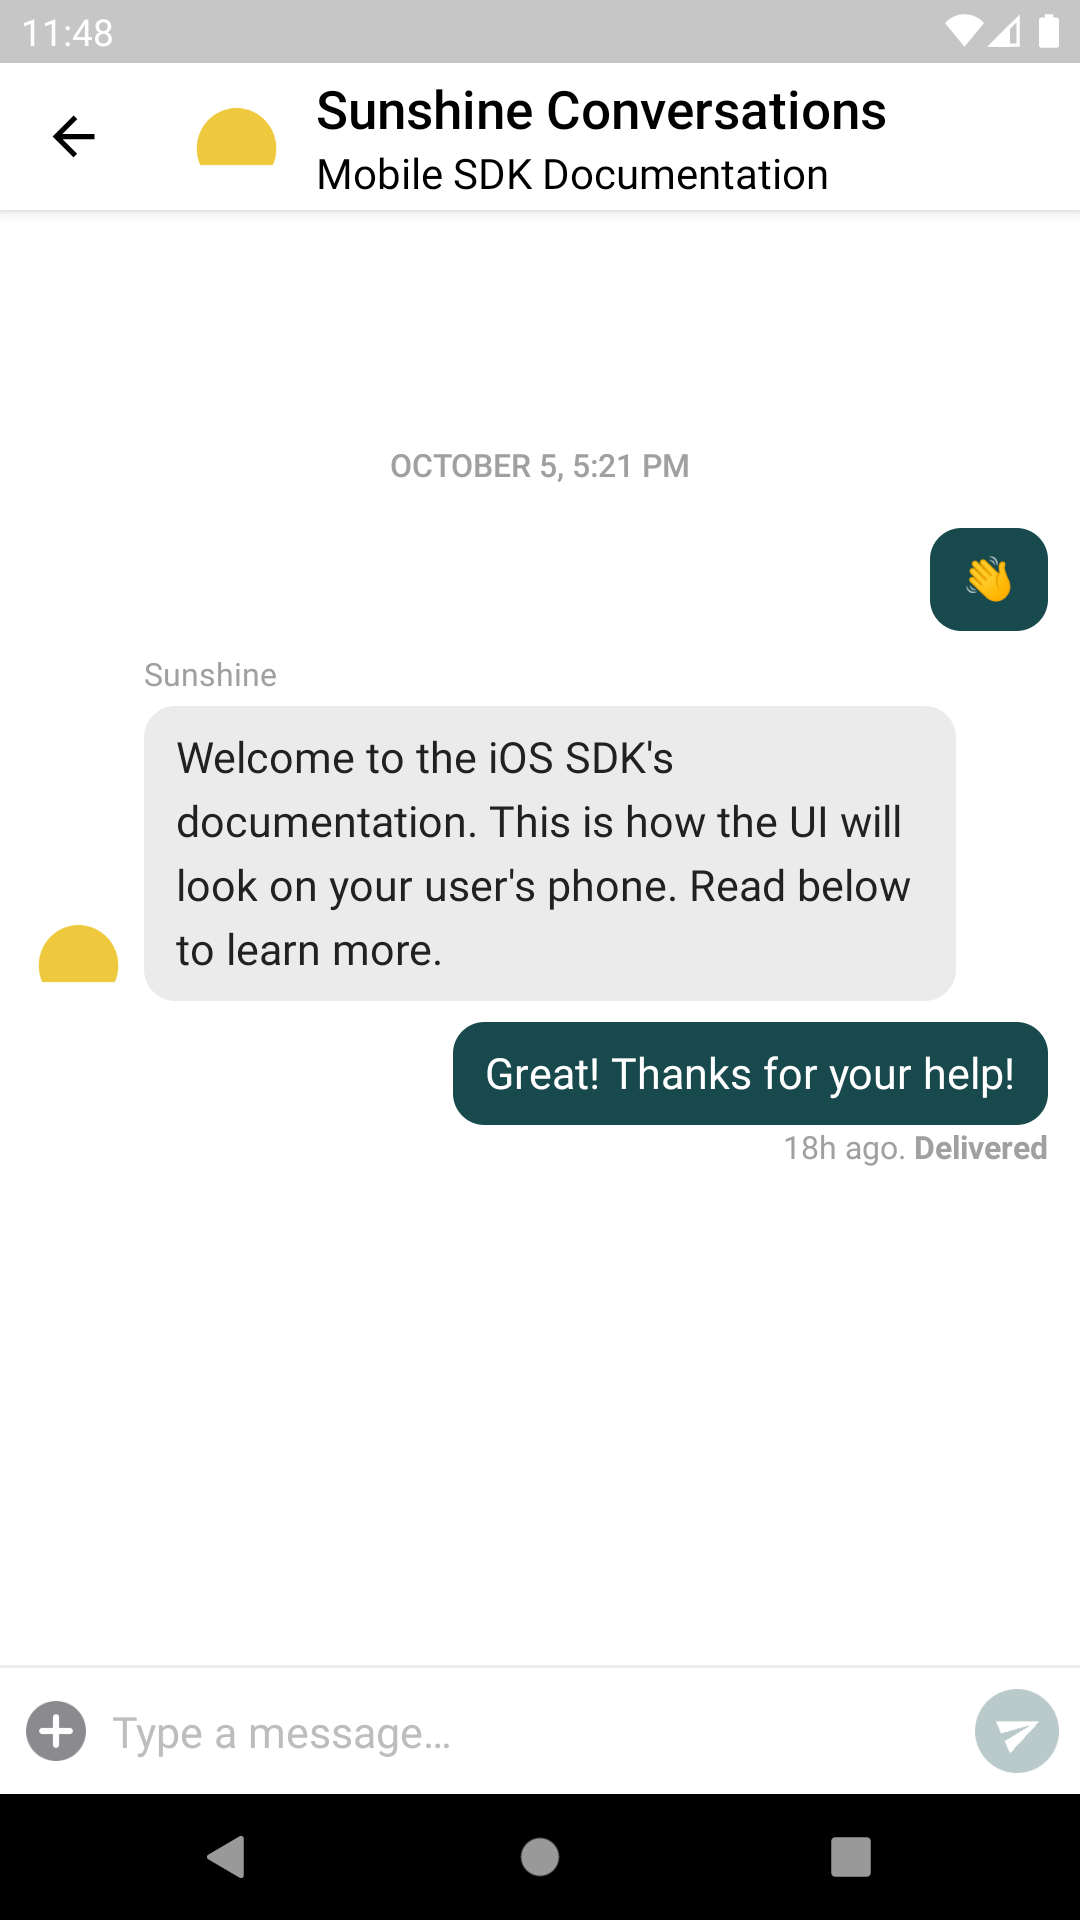
The Sunshine Conversations android SDK is a highly customizable chat embeddable that can be added to any Android app. It supports all the Sunshine Conversations API capabilities, push notifications and is fully localized.
Current version: v
- API reference
- Capabilities
- QuickStart to your first Sunshine Conversation on Android
- Adding Sunshine Conversations to your app
- Region configuration
- Authenticating users
- Configuring push notifications
- Localization
- Customization
- Implementing your own User Interface
- Permissions
Reference
Android SDK includes a client side API to initialize, customize and enable advanced use cases of the SDK. See the Android API reference to discover all the classes and methods available.
Capabilities
Native Android SDK supports a wide variety of capabilities as seen in the channel capabilities grid. Below is a detailed view of each capabilities.
Content Types


Action Types
Structured Messages

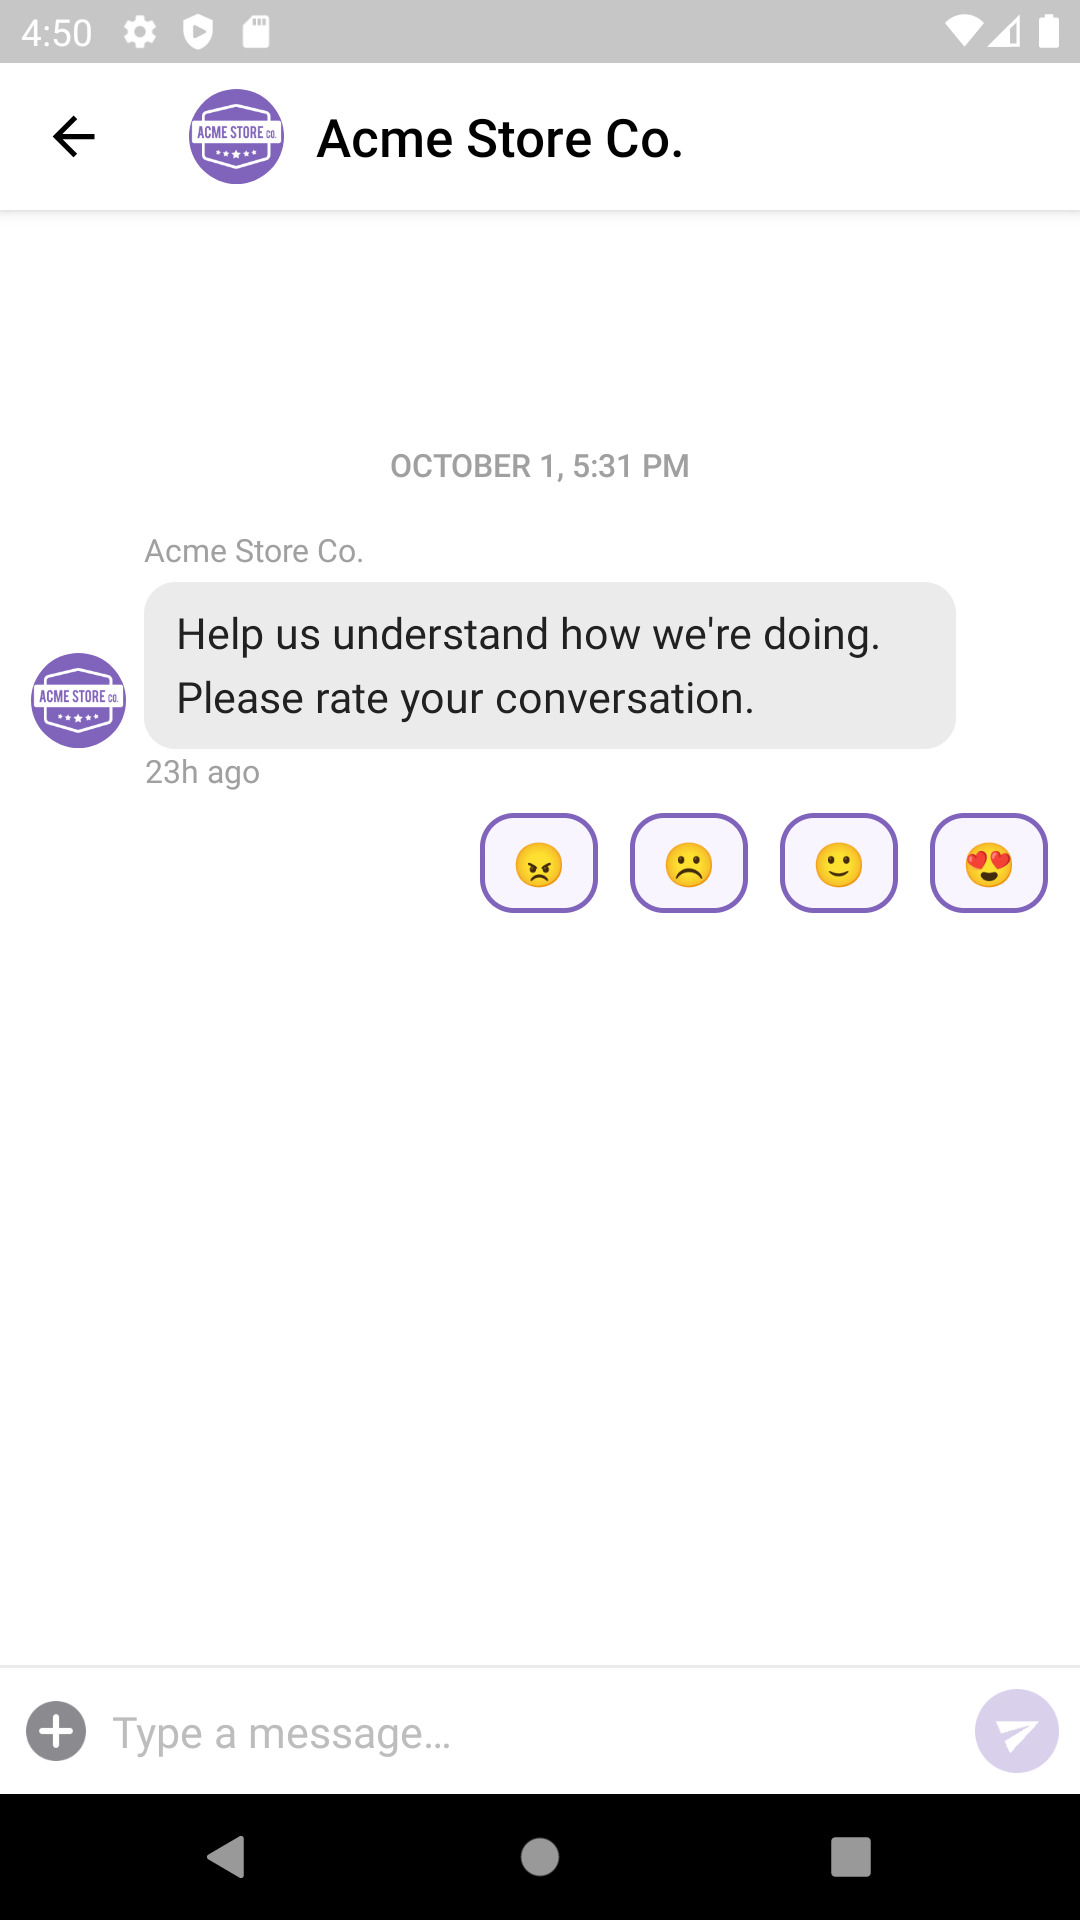
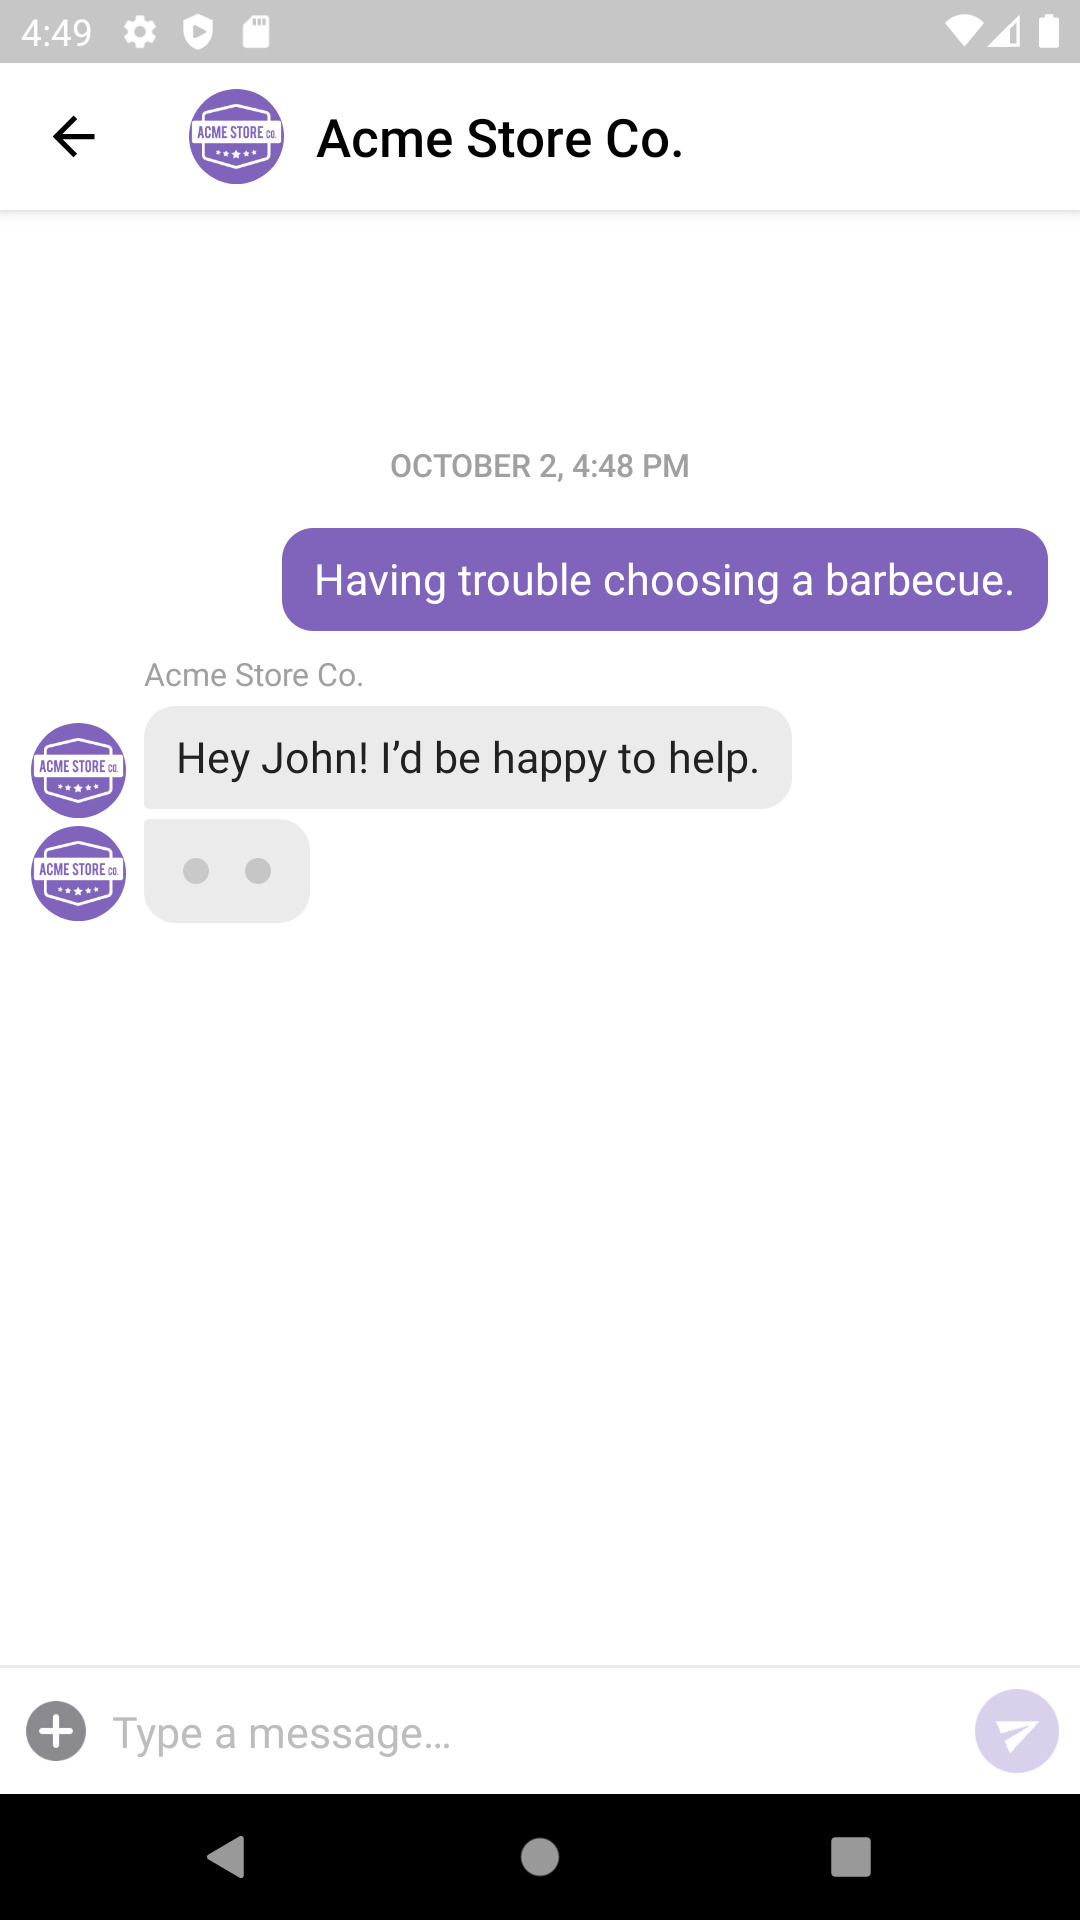
Indicators

Delivery Events
Delivery events allow you to track deliveries of Sunshine Conversations messages to the Android SDK by subscribing to the conversation:message:delivery:channel webhook. Sunshine Conversations also tracks user deliveries on the Android SDK which let you confirm whether a message has reached the user by listening to the conversation:message:delivery:user webhook.
Conversation List
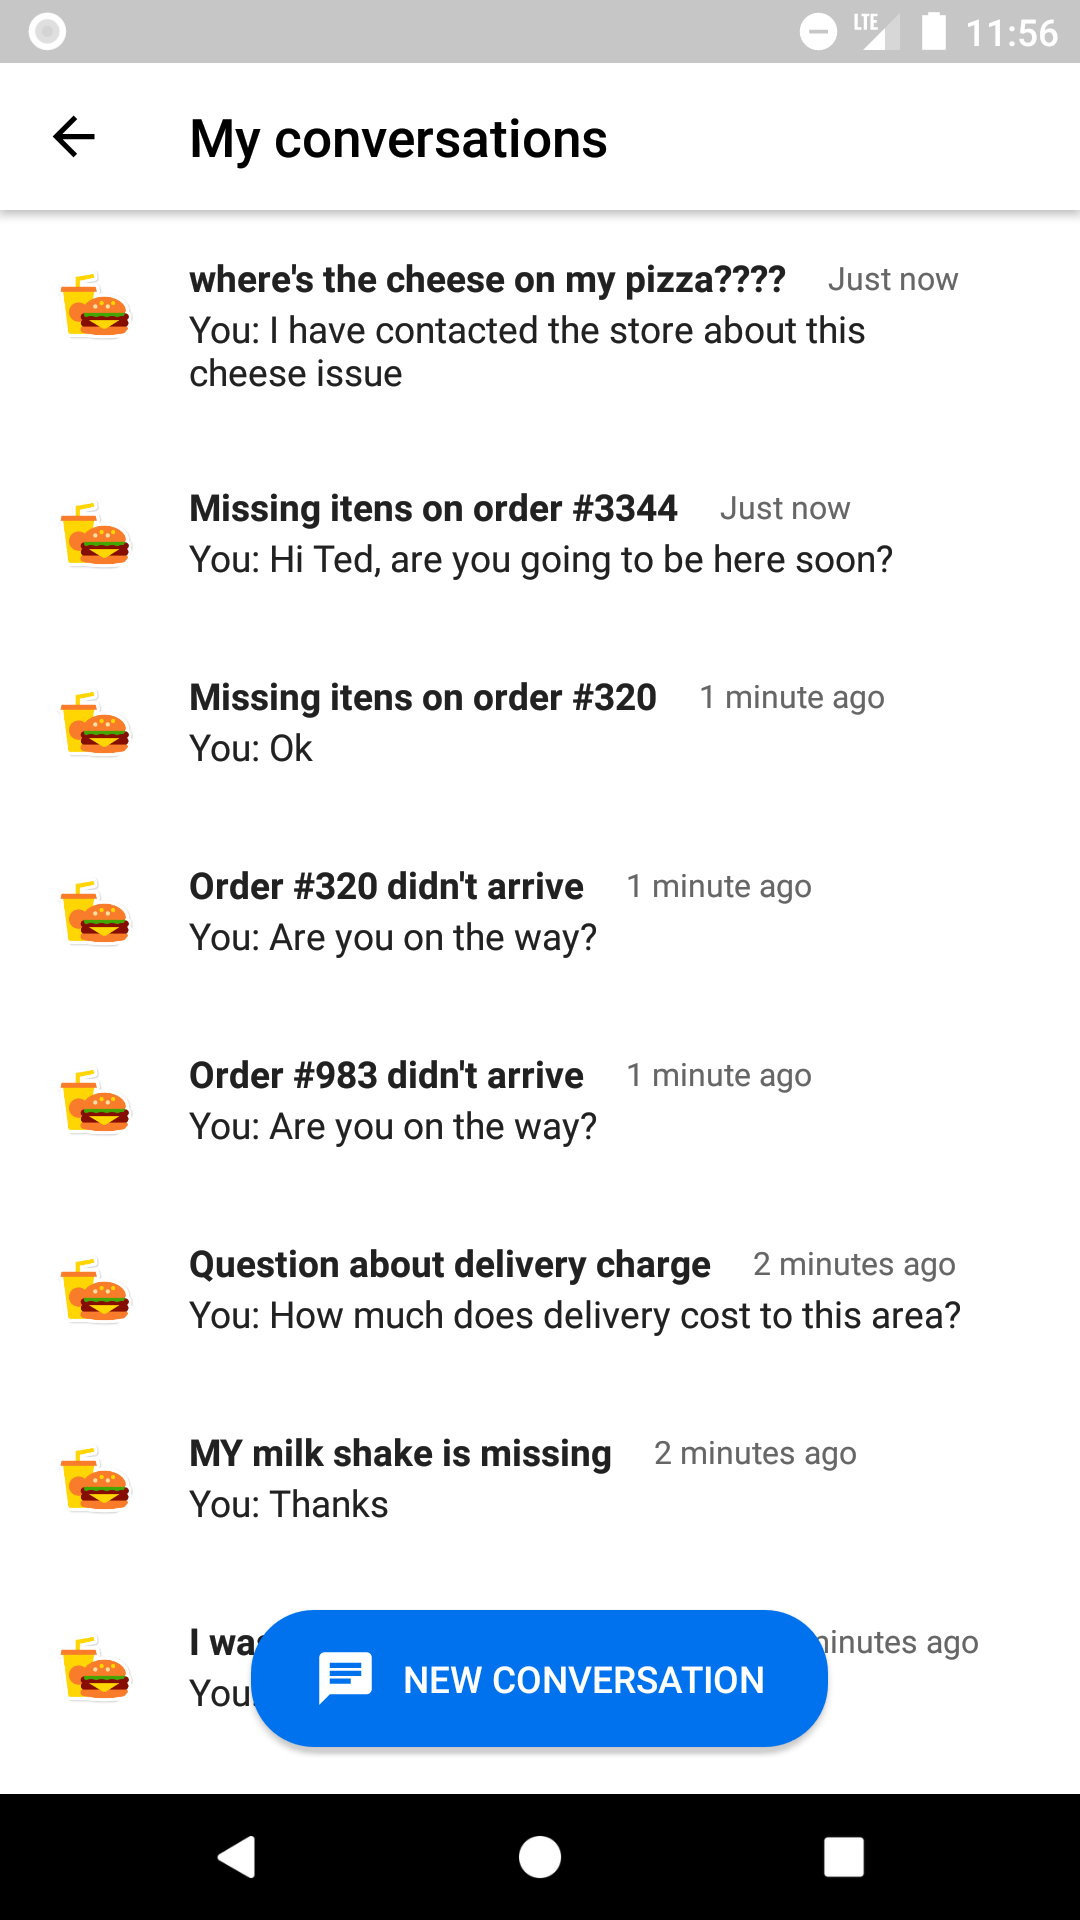
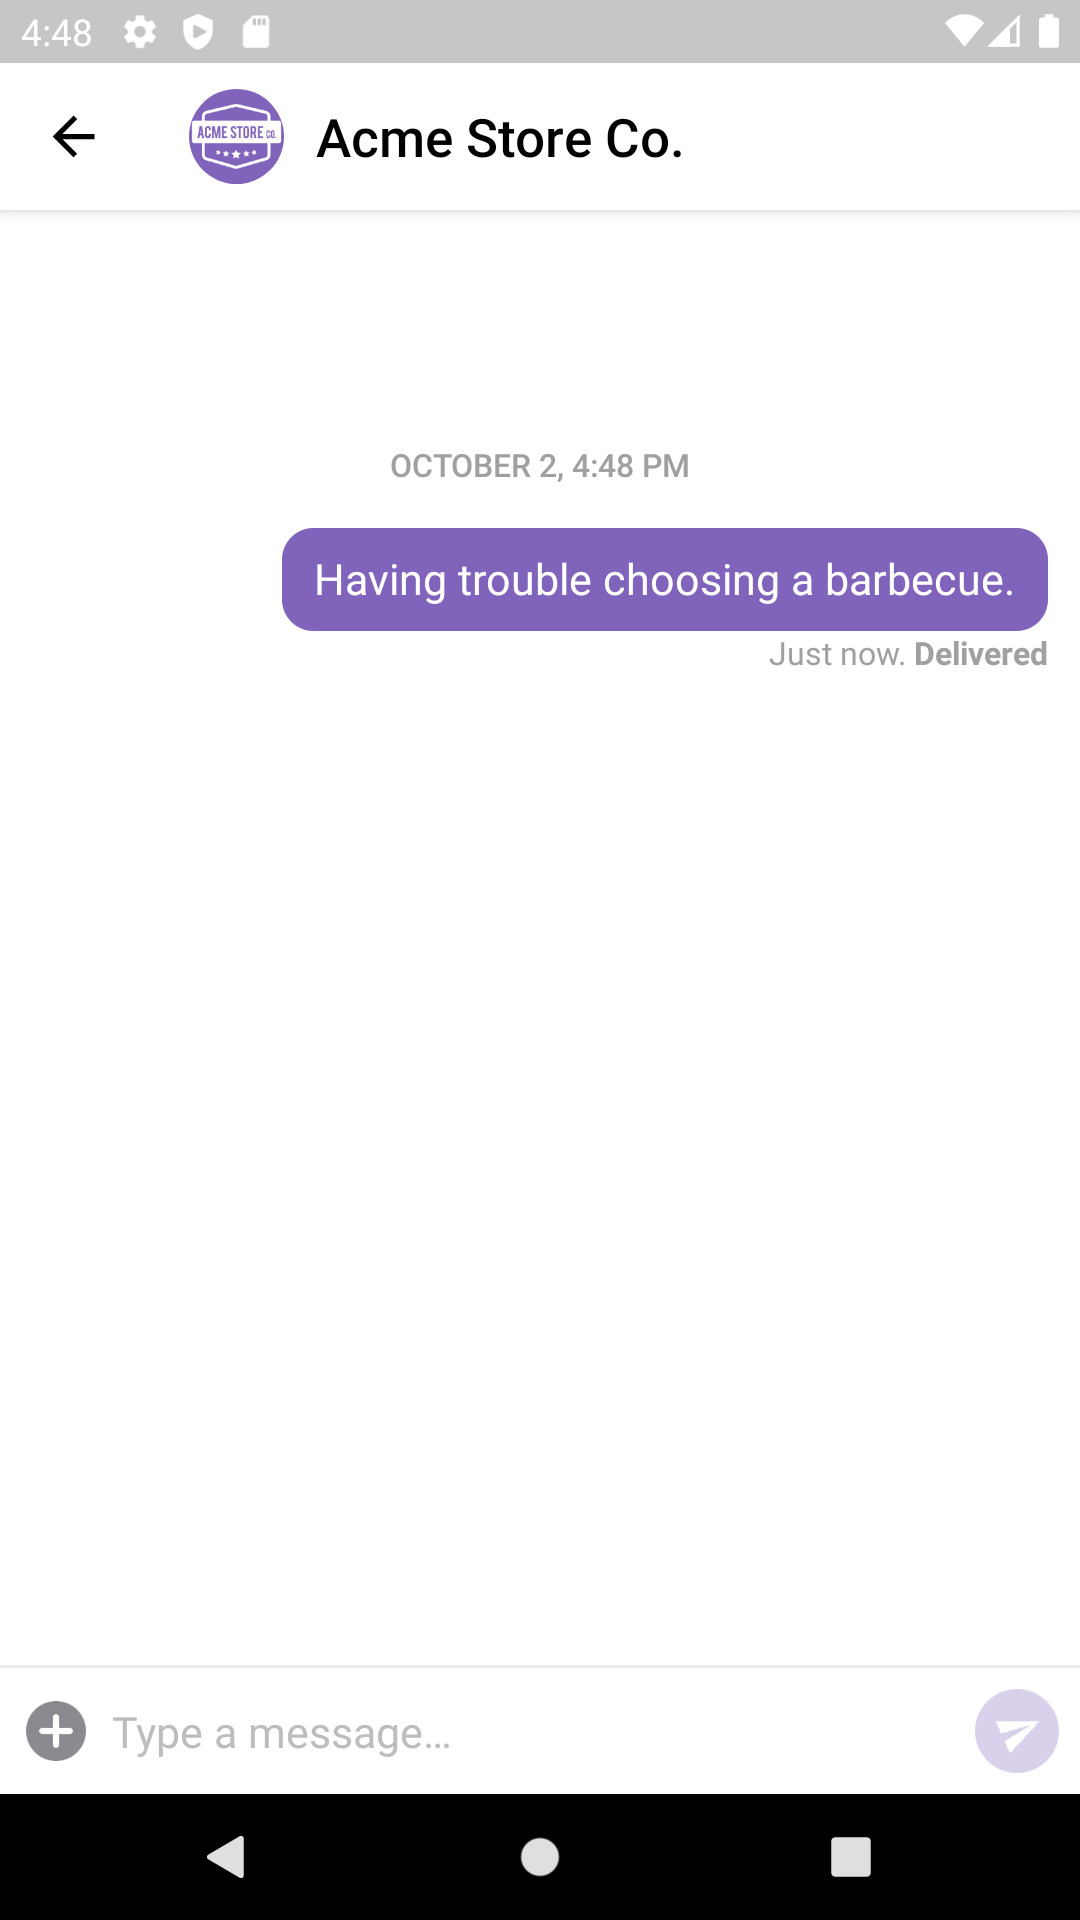
The conversation list allows a user to navigate easily between multiple conversations. In this view, the user can see the names, icons, timestamps and text previews of all conversations.
On initialization, the conversation list loads at most 10 conversations (more if bigger screens allow), ordered from most recently active to least. Users can load additional conversations by scrolling to the bottom of the list.
By default, users can also start new conversations from this view. Using the canUserCreateMoreConversations integration setting, the business can disallow users to create more conversations.
For more information on how to update your web integration, have a look at our API documentation.
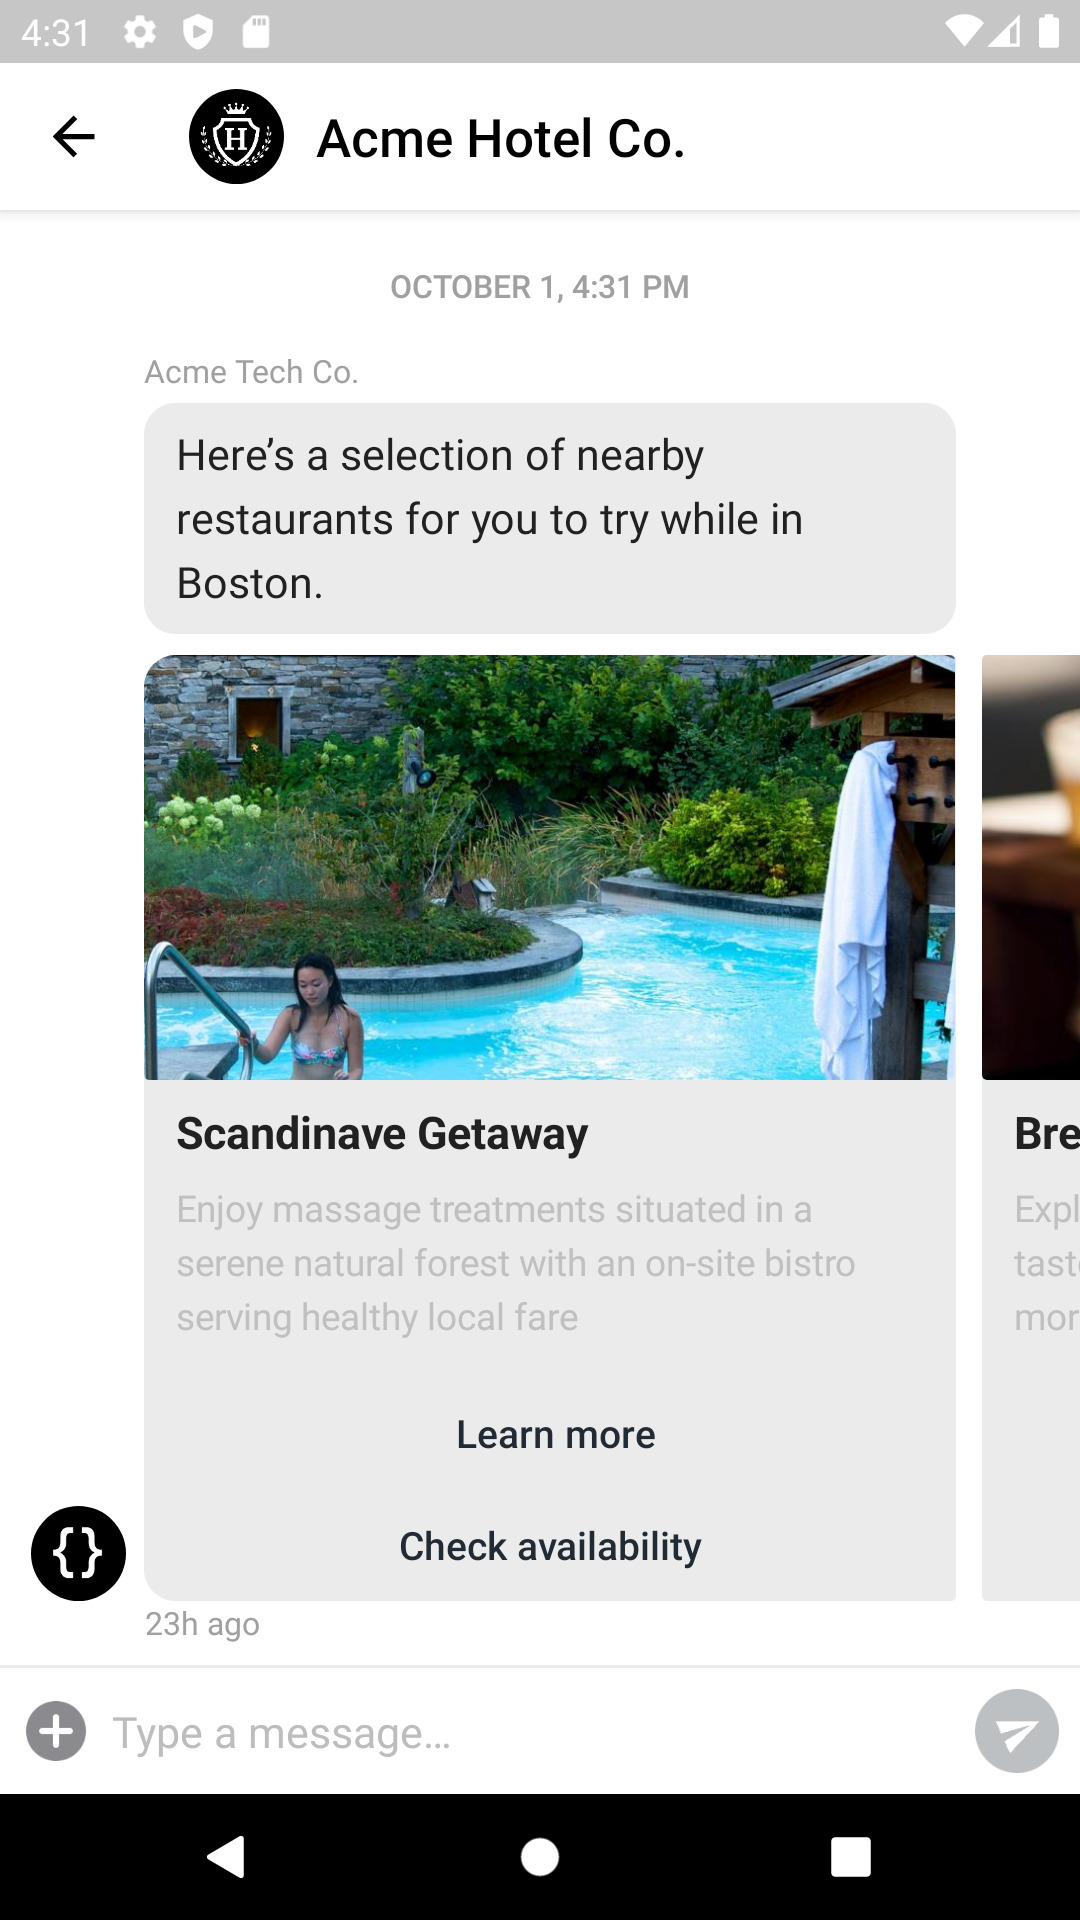
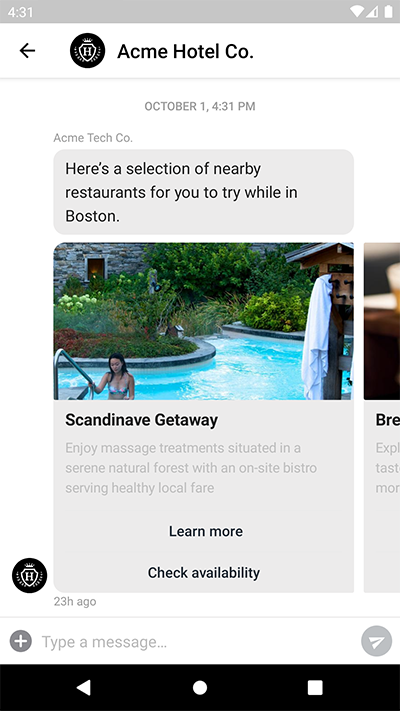
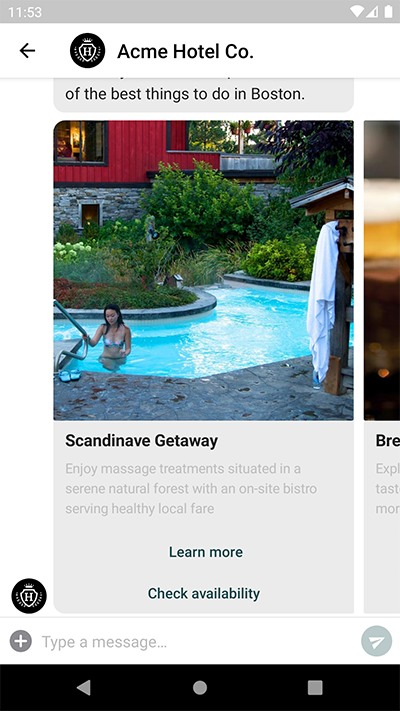
Carousel
Carousels are rendered natively with full functionality in the Android SDK. See our API documentation for instructions on how to send one.
Carousel items
Carousels support up to a maximum of 10 message items. Each message item must include a title and at least one supported action. Optionally, an image and description can be included as well. Images can be displayed in two different aspect ratios, “square” and “horizontal”. For more information, see our API documentation.
Carousel items with “horizontal” images (default):
Carousel items with “square” images:
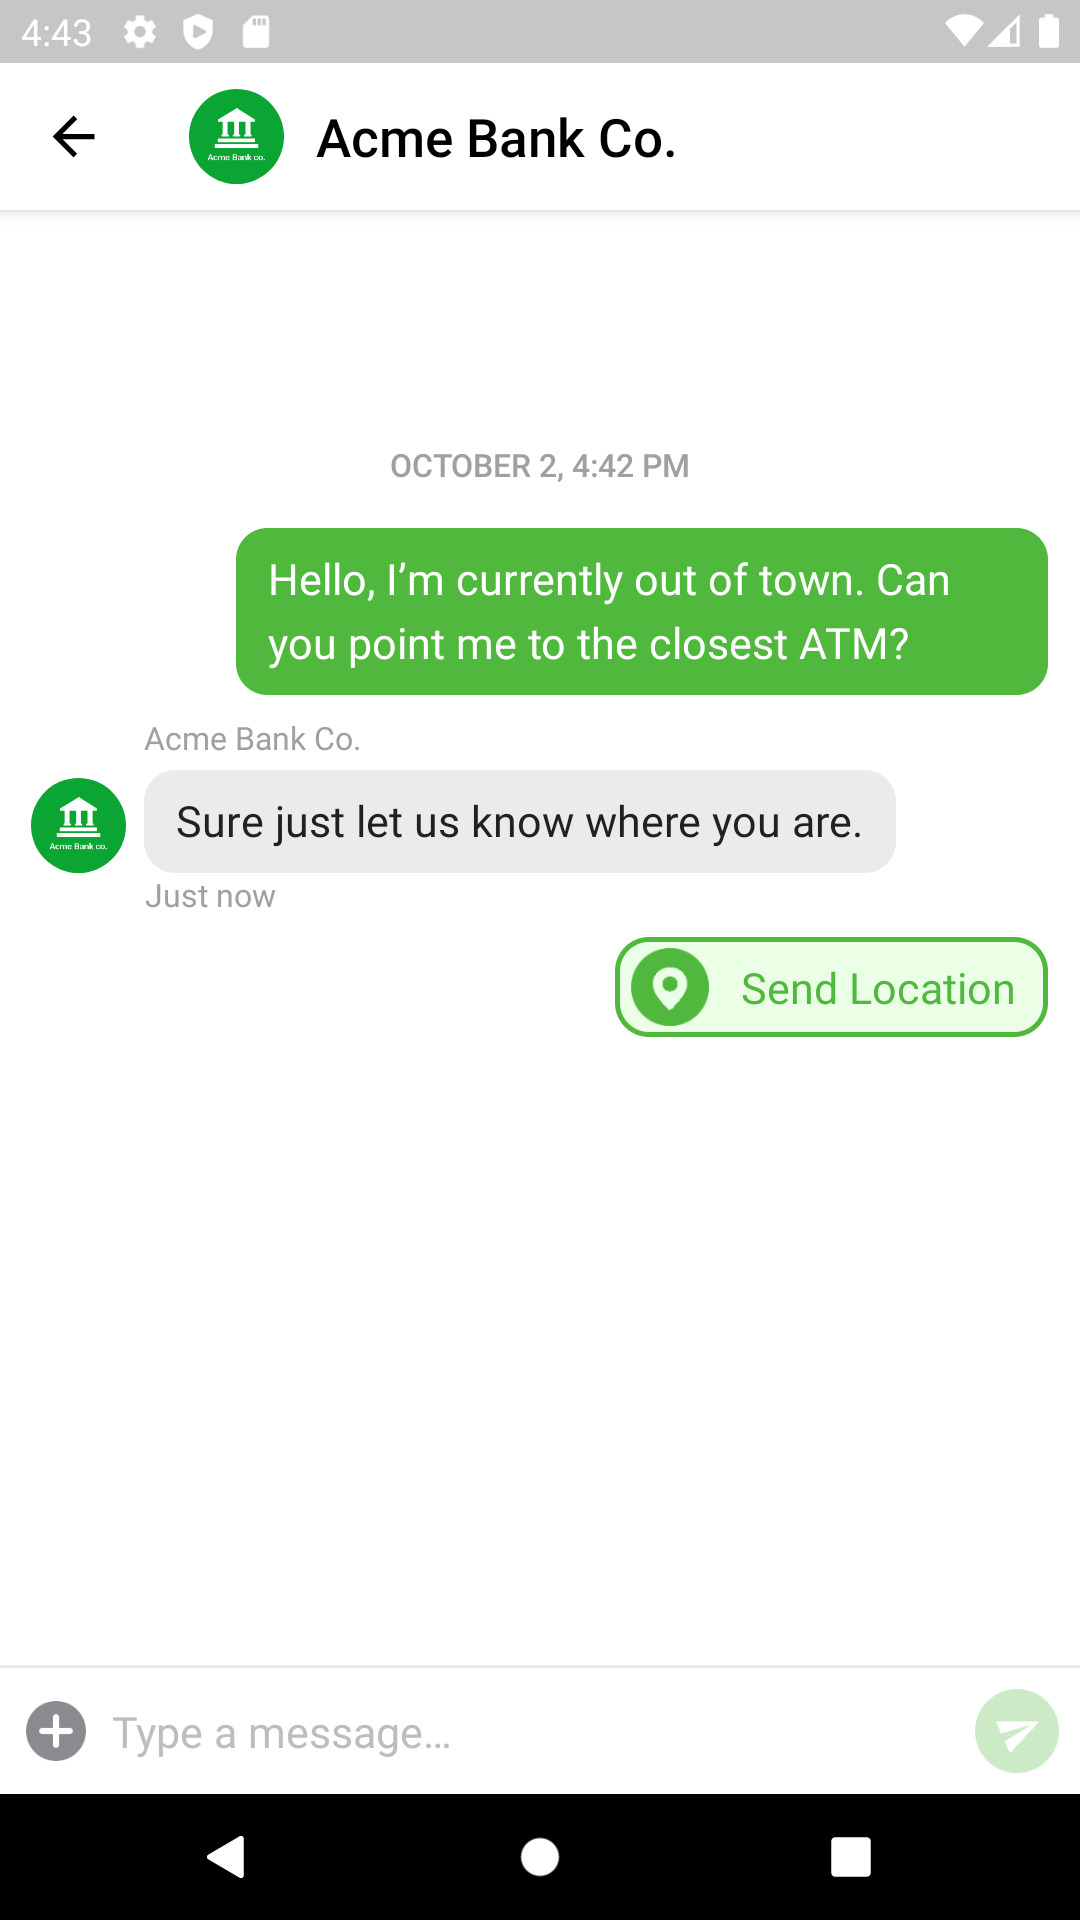
Supported actions
The Android SDK supports the following action types in a carousel message item:
- Link
- Postback
- Buy
- Webview
List message fallback
If the Android SDK receives a list type message, it will display a carousel instead.
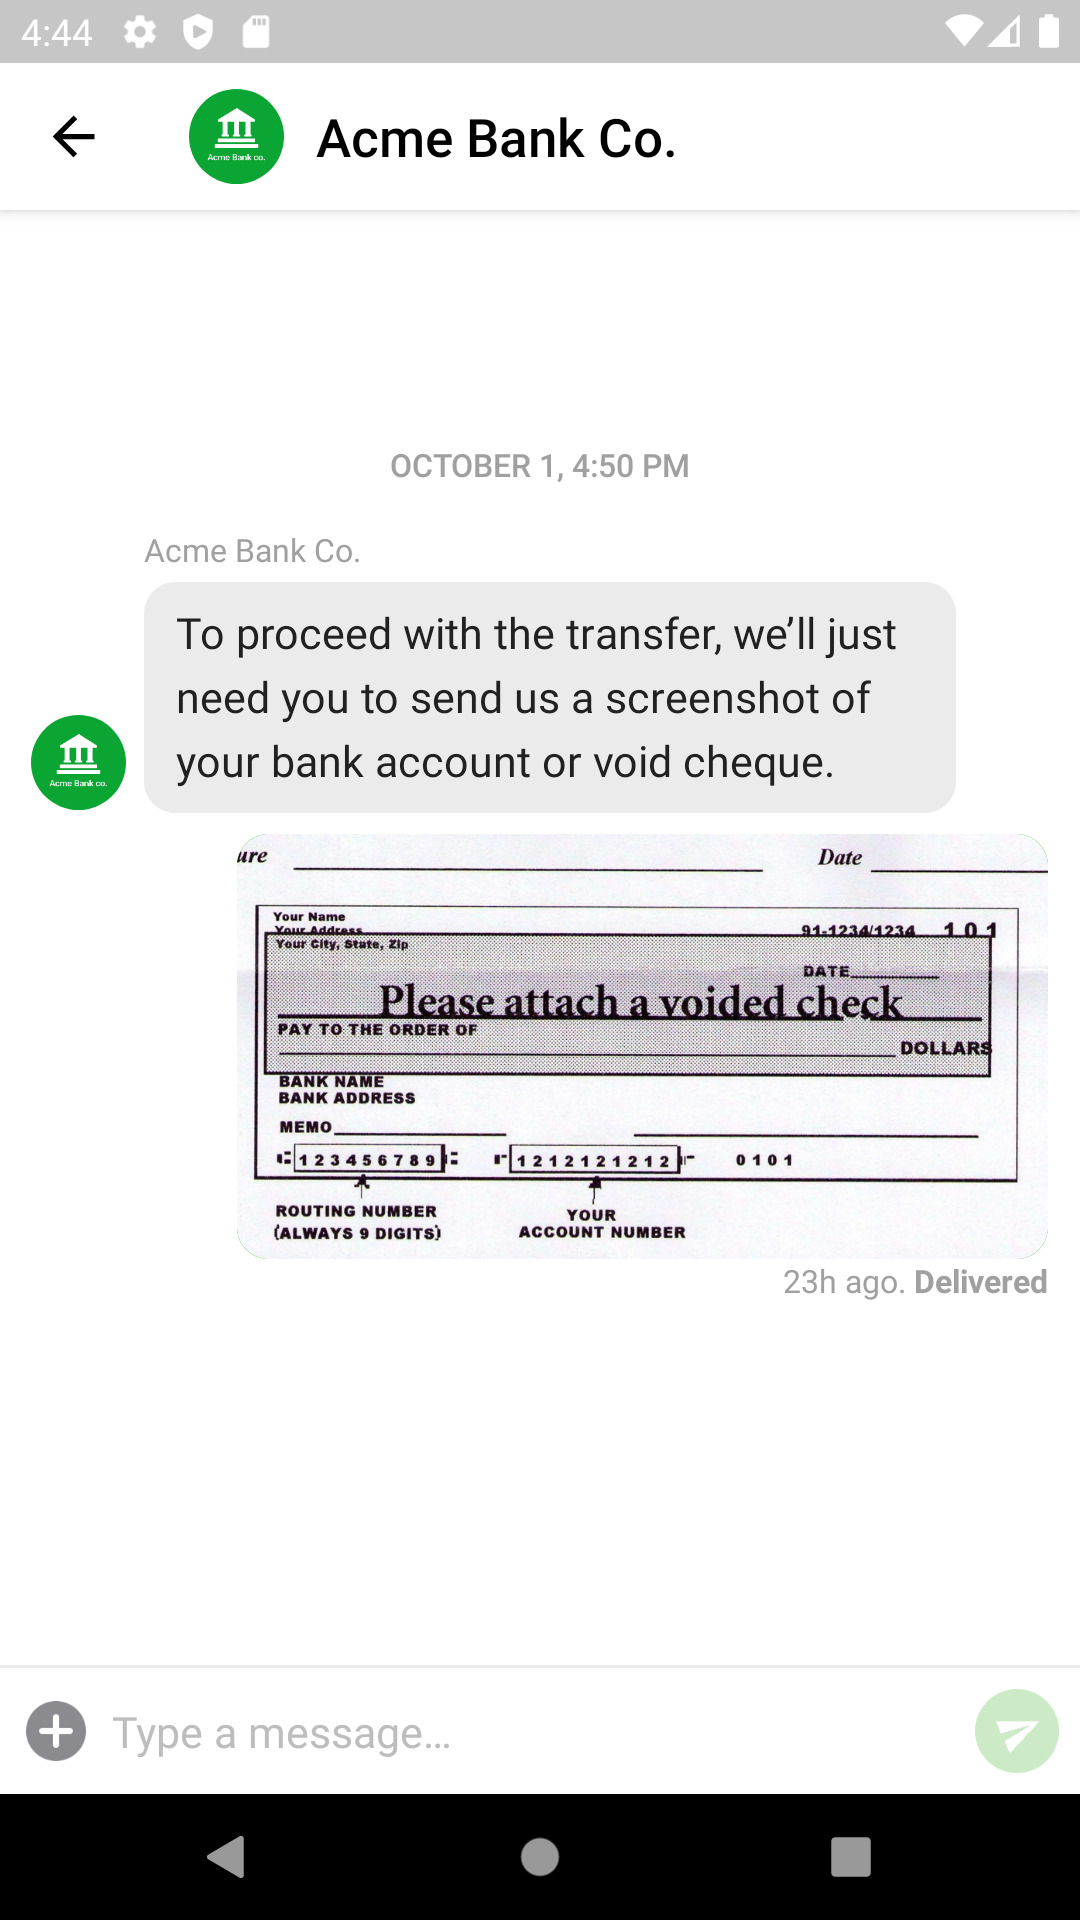
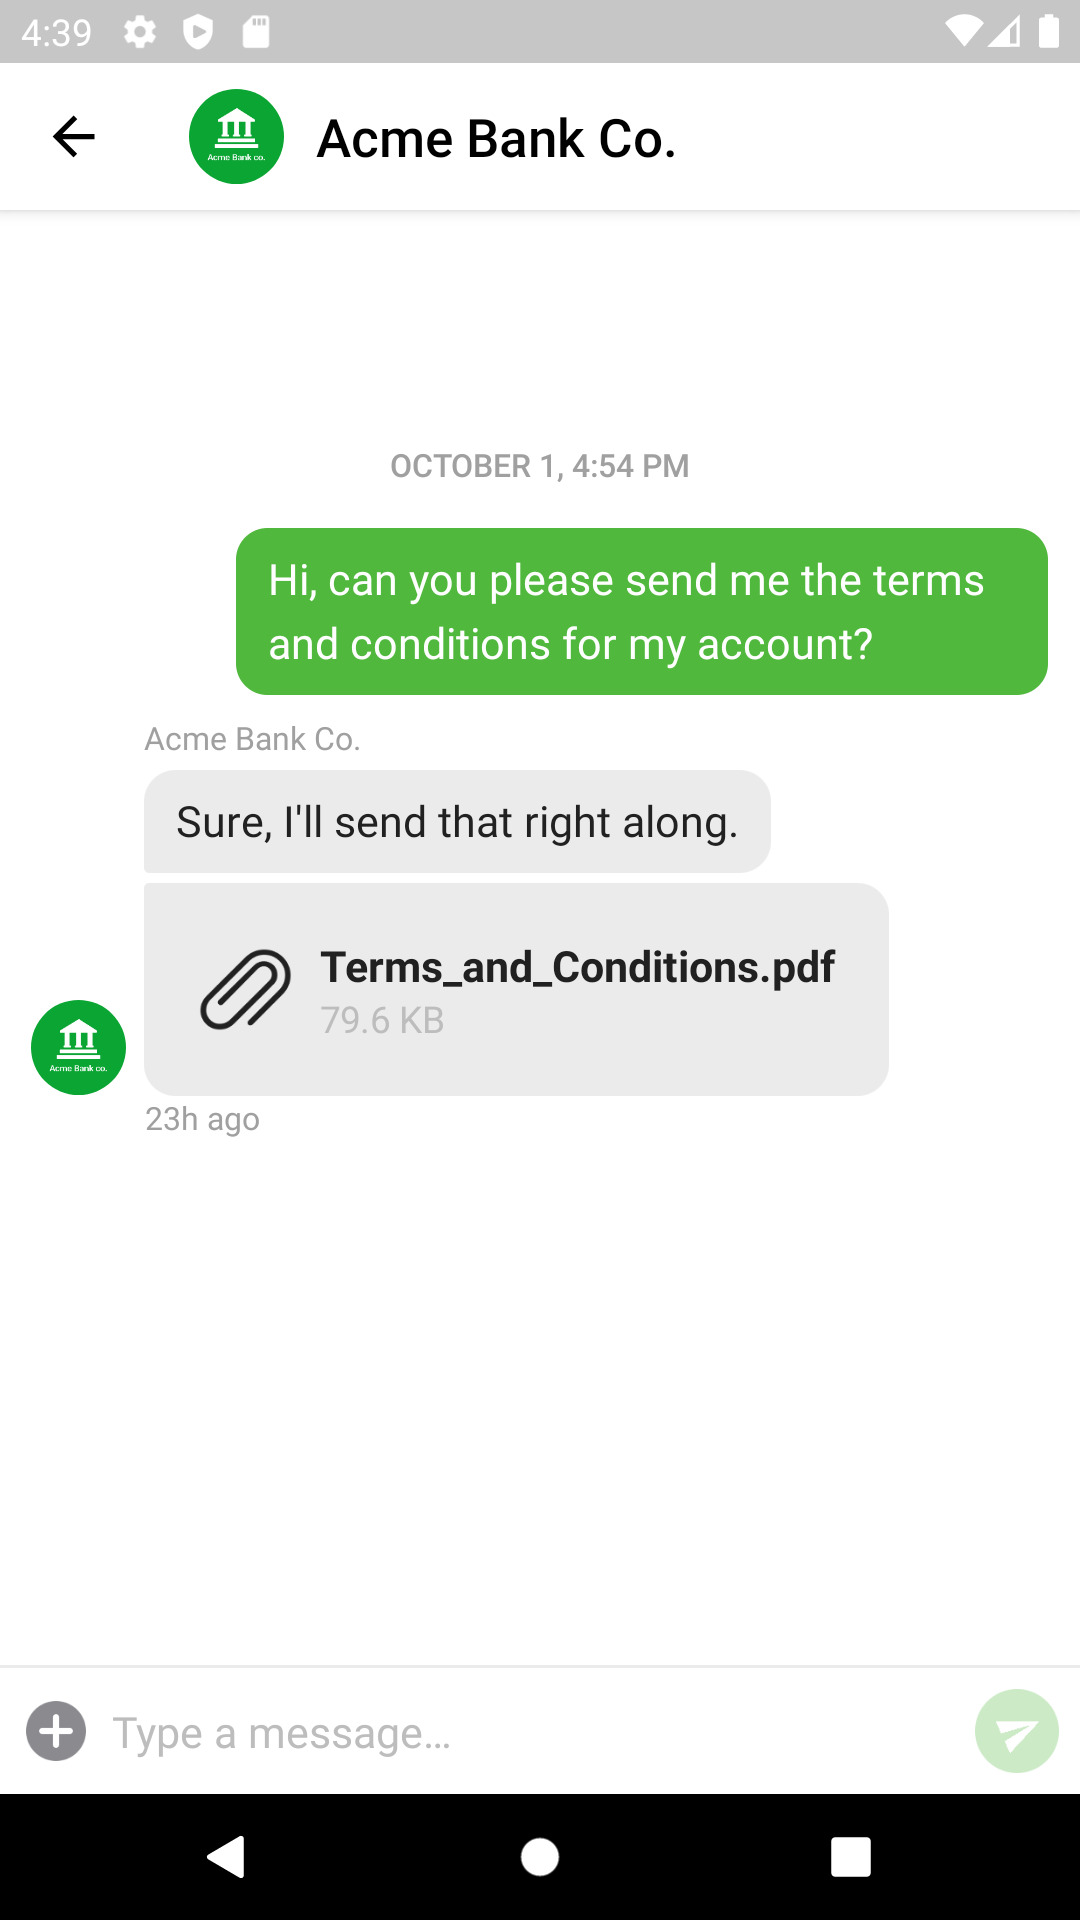
Files
The Android SDK has full native support for sending and receiving files. See our API documentation for instructions on how to send one.
Conversation Extensions
Webviews used in Conversation Extensions support the DOM Storage API, enabling the use of localStorage.
Storage used by JavaScript APIs is automatically cleared on successful logout to protect user data. For anonymous users, explicitly calling WebStorage.getInstance().deleteAllData() is recommended to clear stored data.
Webviews used in Conversation Extensions support the JavaScript enablement API, enabling the use of JavaScript execution.
It is your responsibility to use secure JavaScript that does not introduce security risks for your users. See Security guidelines for enabling JavaScript in web views.
QuickStart to your first Sunshine Conversation on Android
The smooch-android GitHub repo (link in the header) includes a /demo subfolder with a basic implementation of a mobile messaging app that uses the smooch-android SDK to send messages from an Android Device to your Sunshine Conversations app.
Prerequisites
To complete the steps below, you must have Android Studio installed & updated, as well as an Android Device to run the sample mobile app (Physical device or Android Virtual Device (AVD)).
Steps
- Download or clone the GitHub repo to your local machine
- Launch Android Studio
- From the Menu, use
File > Opento open the project’s/demosubfolder - Use CTRL/CMD+Shift+F to search for the string
Smooch.init(this- Double-click on the line found to jump to that file/line
- Replace the integrationId value (default:
"59a93c829200175800018222") with your Sunshine Conversations android-sdk integrationId (including the double-quotes)- Use the API’s /sdks endpoint to pre-create (or list existing) SDK integrationIds
- From the Menu, select
Build > Clean Project(if the project was built/run and code changes were made) - Ensure your Android device is connected (or AVD has been created/configured)
- From the Menu, select
Run > Run App - Message your Sunshine Conversations app!
Adding Sunshine Conversations to your app
The Sunshine Conversations library is distributed in both AAR and JAR format. If you are using Android Studio, follow the instructions for installation of the AAR package.
Android Studio with Gradle
Setup Zendesk as a Maven repository.
repositories {
    maven { url "https://zendesk.jfrog.io/zendesk/repo/" }
}
Add the dependencies right into your build.gradle file.
// See https://github.com/smooch/smooch-android to pin the latest version
implementation 'io.smooch:core:9.9.1'
implementation 'io.smooch:ui:9.9.1'
Sync the Gradle project, then add the necessary code to initialize Sunshine Conversations in your app.
Initialize Sunshine Conversations in your app
After following the steps above, your app is set up for working with the Sunshine Conversations SDK. Before your code can invoke its functionality, you’ll have to initialize the library using your Android integration ID. This ID uniquely identifies your integration and links it to the Sunshine Conversations backend that does the heavy lifting necessary to bridge the gap between you and your users.
You can find your Integration ID in the Sunshine Conversations dashboard when connecting an Android SDK integration as a Customer Channel to your Sunshine Conversations app or through the API.
Once you’ve located your integration ID, you can initialize in two different ways: from your Application class (suggested), or from an Activity class:
Initialize from your Application class
Add the following lines of code to your onCreate method on your Application class:
Smooch.init(this, new Settings("YOUR_INTEGRATION_ID"), new SmoochCallback<InitializationStatus>() {
    @Override
    public void run(@NonNull Response<InitializationStatus> response) {
        // Handle the response, no casting required...
        if (response.getData() == InitializationStatus.SUCCESS) {
            // Your code after init is complete
        } else {
            // Something went wrong during initialization
        }
    }
});If you don’t have an Application class, you must create one to make sure Sunshine Conversations is always initialized properly. You can follow the instructions here.
Initialize from an Activity class
You can also initialize from an Activity. This is useful if you don’t know your integration ID at app launch or if you want to run many apps in the same Android app.
Add the following line of code to your onCreate method on your Application class:
Smooch.init(this);If you don’t have an Application class, you must create one to make sure Sunshine Conversations is always initialized properly. You can follow the instructions here.
Add the following line of code where you want to initialize Sunshine Conversations in your Activity class:
Smooch.init(this, new Settings("YOUR_INTEGRATION_ID"), new SmoochCallback<InitializationStatus>() {
    @Override
    public void run(@NonNull Response<InitializationStatus> response) {
        if (response.getData() == InitializationStatus.SUCCESS) {
            // Your code after init is complete
        } else {
            // Something went wrong during initialization
        }
    }
});
For example, to initialize when a button is tapped, you can do the following:
package your.package;

import android.os.Bundle;
import android.support.v7.app.AppCompatActivity;
import android.view.View;
import android.widget.Button;

import io.smooch.core.InitializationStatus;
import io.smooch.core.Settings;
import io.smooch.core.Smooch;
import io.smooch.core.SmoochCallback;
import io.smooch.ui.ConversationActivity;

public class YourActivity extends AppCompatActivity implements View.OnClickListener {
    @Override
    protected void onCreate(final Bundle savedInstanceState) {
        super.onCreate(savedInstanceState);
        setContentView(R.layout.activity_main);

        Button showConversationActivityButton = findViewById(R.id.button_show_conversation_activity);
        showConversationActivityButton.setOnClickListener(this);
    }

    public void onClick(View v) {
        final int id = v.getId();

        if (id == R.id.button_show_conversation_activity) {
            Smooch.init(getApplication(), new Settings("YOUR_INTEGRATION_ID"), new SmoochCallback<InitializationStatus>() {
                @Override
                public void run(@NonNull Response<InitializationStatus> response) {
                    if (response.getData() == InitializationStatus.SUCCESS) {
                        ConversationActivity.show(getApplicationContext());
                    } else {
                        // Something went wrong during initialization
                    }
                }
            });

        }
    }
}If you initialize Sunshine Conversations from an Activity, you’ll need to handle initialization when receiving a push notification. To do so, override the activity that is opened when tapping a notification and initialize Sunshine Conversations before opening ConversationActivity. For example:
package your.package;

import android.os.Bundle;
import android.support.v7.app.AppCompatActivity;

import io.smooch.core.InitializationStatus;
import io.smooch.core.Settings;
import io.smooch.core.Smooch;
import io.smooch.core.SmoochCallback;
import io.smooch.ui.ConversationActivity;

public class YourNotificationHandlerActivity extends AppCompatActivity {
    @Override
    protected void onCreate(final Bundle savedInstanceState) {
        super.onCreate(savedInstanceState);
        Smooch.init(getApplication(), new Settings("YOUR_INTEGRATION_ID"), new SmoochCallback<InitializationStatus>() {
            @Override
            public void run(@NonNull Response<InitializationStatus> response) {
                if (response.getData() == InitializationStatus.SUCCESS) {
                    ConversationActivity.show(getApplicationContext());
                } else {
                    // Something went wrong during initialization
                }
            }
        });
    }
}
Adding an Application class to your app
If you don’t have an Application class in your app, you can copy the following and save it to your application package.
package your.package;

import android.app.Application;

public class YourApplication extends Application {
    @Override
    public void onCreate() {
        super.onCreate();
        // Initialize Sunshine Conversations here
    }
}
You also need to declare your newly created Application class in the <application> tag in your AndroidManifest.
<application
    android:name="your.package.YourApplication">
    ...
</application>Displaying the Sunshine Conversations User Interface
Once you’ve initialized Sunshine Conversations, you’re ready to try it out.
Find a suitable place in your app’s interface to invoke Sunshine Conversations and use the code below to display the Sunshine Conversations user interface. You can bring up Sunshine Conversations whenever you think that your user will need access to help or a communication channel to contact you.
ConversationActivity.show(this);You should also take the time to configure the push notifications setup.
Displaying the Sunshine Conversations List User Interface
Once the Sunshine Conversations is initialized you can also show the Conversations List User Interface. This is done by invoking the ConversationListActivity builder and calling show.
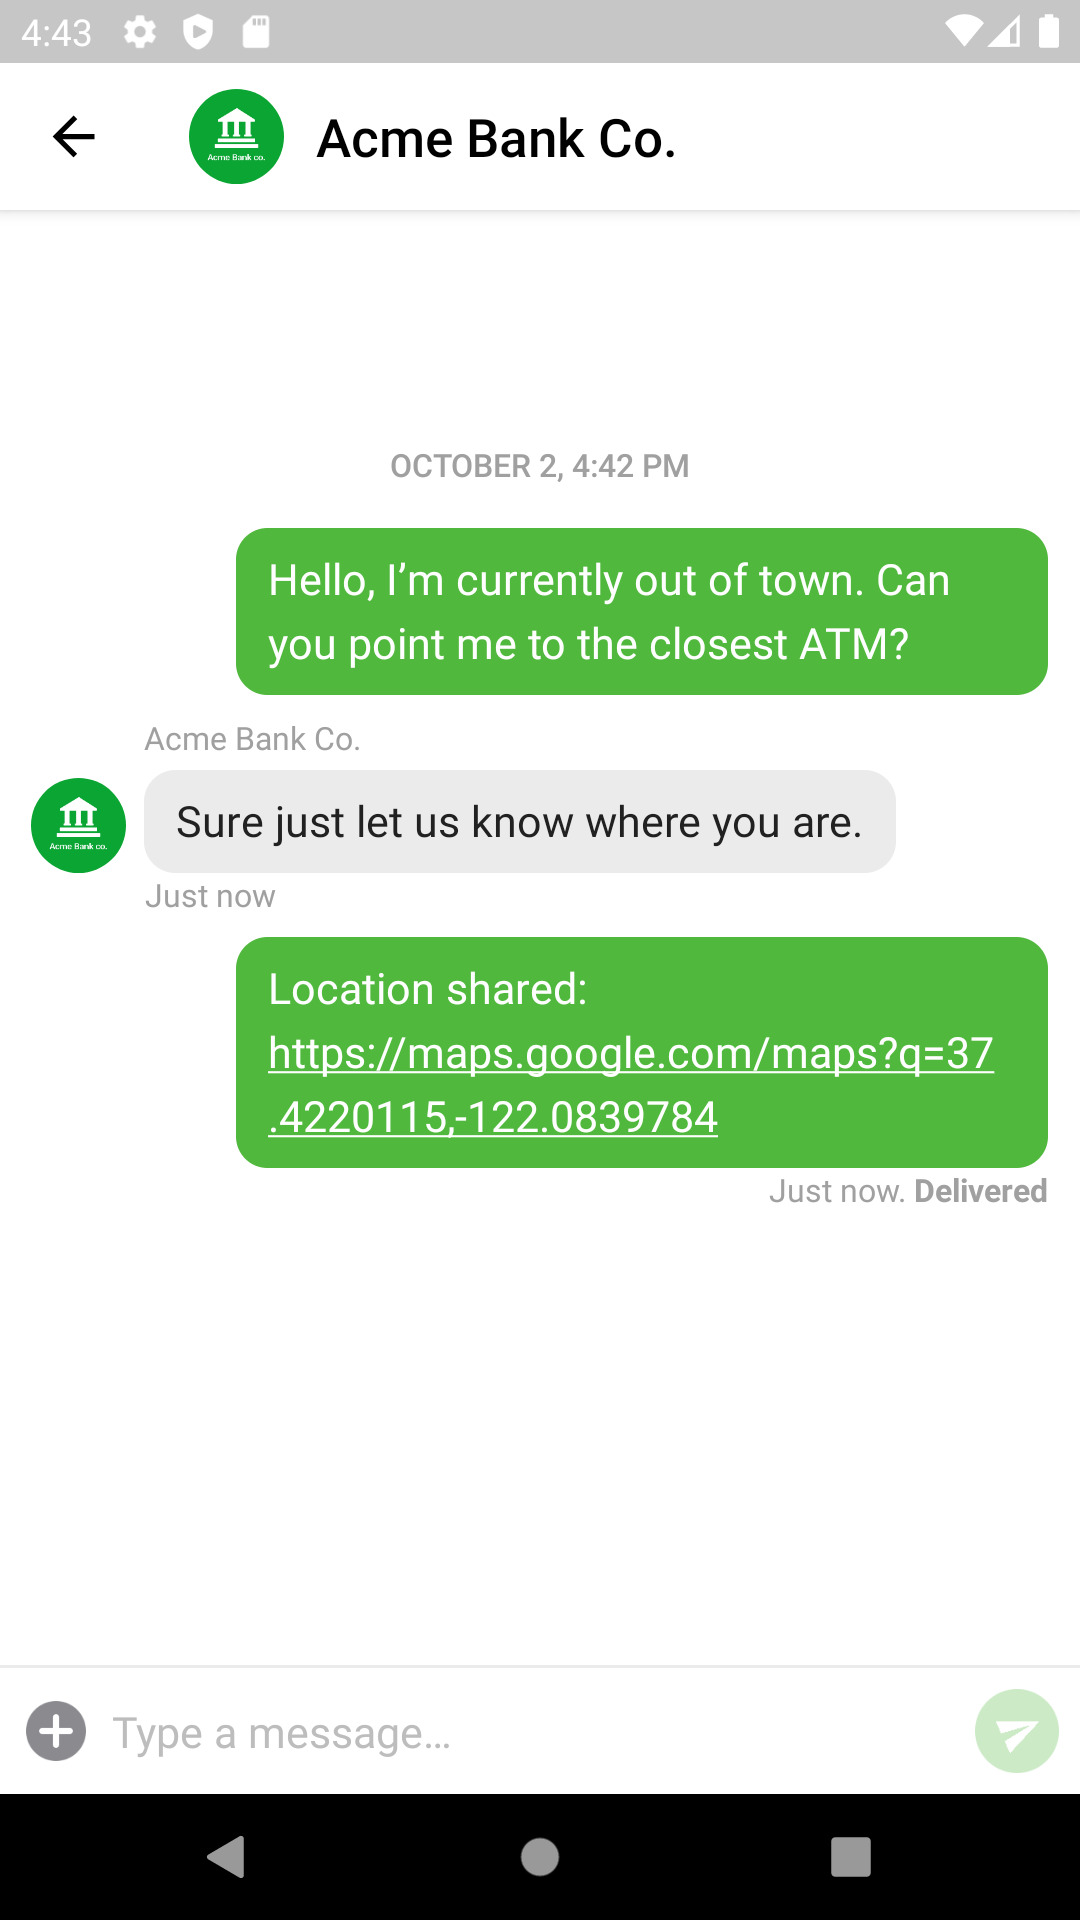
ConversationListActivity.builder().show(this);Location messages
Sunshine Conversations offers the option to render location messages with a Google Maps preview. To do so, you must provide your Google Maps API Key when initializing the SDK.
Settings settings = new Settings("YOUR_INTEGRATION_ID");
settings.setMapsApiKey("YOUR_MAPS_API_KEY");

Smooch.init(this, settings, new SmoochCallback<InitializationStatus>() {
    @Override
    public void run(@NonNull Response<InitializationStatus> response) {
        if (response.getData() == InitializationStatus.SUCCESS) {
            // Your code after init is complete
        } else {
            // Something went wrong during initialization
        }
    }
});
Location messages are rendered as text messages when a Maps API Key is not present.
Replacing the Sunshine Conversations FileProvider
In order to replace the Sunshine Conversations FileProvider with your own, please do the following:
-
Add
tools:replace="android:authorities"to the<provider>entry. -
Add the following path to your
android.support.FILE_PROVIDER_PATHSresource file:
<external-path name="dcim" path="DCIM"/>- When initializing Sunshine Conversations, call
settings.setFileProviderAuthorities(authoritiesString);on the settings object.
Settings settings = new Settings(integrationId);
settings.setFileProviderAuthorities(authoritiesString);
Smooch.init(this, settings, myInitCallback);
Region configuration
The Android SDK is supported in the following regions:
| Name | Region identifier |
|---|---|
| United States | Leave unspecified |
| European Union | eu-1 |
To target the EU region for example, set the region identifier with Settings.setRegion():
Settings settings = new Settings("YOUR_INTEGRATION_ID");
settings.setRegion("eu-1");
Smooch.init(this, settings, new SmoochCallback<InitializationStatus>() {
    @Override
    public void run(@NonNull Response<InitializationStatus> response) {
        if (response.getData() == InitializationStatus.SUCCESS) {
            // Your code after init is complete
        } else {
            // Something went wrong during initialization
        }
    }
});
If you are a licensed Zendesk customer, use Settings.setServiceBaseUrl() instead of region. Settings.setServiceBaseUrl() specifies the URL where the config request is sent. For example:
Settings settings = new Settings("YOUR_INTEGRATION_ID");
settings.setServiceBaseUrl("https://<subdomain>.zendesk.com/sc/");
Smooch.init(this, settings, new SmoochCallback<InitializationStatus>() {
    @Override
    public void run(@NonNull Response<InitializationStatus> response) {
        if (response.getData() == InitializationStatus.SUCCESS) {
            // Your code after init is complete
        } else {
            // Something went wrong during initialization
        }
    }
});
Login with externalId and JWT
After Sunshine Conversations has initialized, your user can start sending messages right away. These messages will show up on the business side under a new Sunshine Conversations user. However, these users will not yet be associated to any user record you might have in an existing user directory.
If your application has a login flow, or if a user needs to access the same conversation from multiple devices, this is where the login method comes into play. You can associate Sunshine Conversations users with your own user directory by assigning them an externalId. You will then issue each user a jwt credential during the login flow. You can read more about this in the Authenticating users section.
Authentication delegate
The Android SDK offers an AuthenticationDelegate which will be called when an invalid authentication token has been sent to Sunshine Conversations. It allows you to provide a new token for all subsequent requests. The request that originally failed will be retried up to five times. To set the delegate, set it in the Settings object when initializing the SDK:
Settings settings = new Settings(“myIntegrationId”);
settings.setAuthenticationDelegate(authDelegate);
Smooch.init(application, settings, initCallback);
Where authDelegate is an instance that implements the AuthenticationDelegate interface.
For example:
class MyAuthDelegate implements AuthenticationDelegate {

    /**
 	* Notifies the delegate of a failed request due to invalid credentials
 	*
 	* @param error	detail about the authentication error
 	* @param callback callback to invoke with a new token
 	*/
    void onInvalidAuth(AuthenticationError error, AuthenticationCallback completionHandler) {
        // retrieve new token
        completionHandler.updateToken(updatedToken);
    }
}
See Expiring JWTs on SDKs for more information.
Configuring push notifications
Push notifications are a great, unobtrusive way to let your users know that a reply to their message has arrived.
Step 1. Generate a FCM configuration file for your Android project
-
Go to Google’s Firebase console.
-
If you do not have a project already, create a new one.
-
Once created, click on “Add Firebase to your Android app” and follow the instructions to generate your
google-services.jsonfile (for your package name, copy and paste the package used in your application’sAndroidManifest.xmlfile). -
Save the
google-services.jsonfile generated by the tool at the root of your Android application (<project>/<app-module>/google-services.json). -
Follow the Gradle instructions and modify your
build.gradlefiles accordingly:- Project-level build.gradle (
<project>/build.gradle):
buildscript { dependencies { // Add this line classpath 'com.google.gms:google-services:4.3.3' } }- App-level build.gradle (
<project>/<app-module>/build.gradle):
// Add to the bottom of the file apply plugin: 'com.google.gms.google-services'- Press
Sync nowin the bar that appears in the IDE.
- Project-level build.gradle (
In most migration scenarios, the Firebase Cloud Messaging (FCM) v1 API is enabled by default. If you encounter errors when trying to contact the endpoint, ensure that “Firebase Cloud Messaging API” is enabled in the list of APIs and services within the Google Cloud console.
Step 2. Configure push notifications in Sunshine Conversations
First, create your service account key file which contains your credentials needed for the next step.
-
In the Firebase console, click Settings > Service Accounts.
-
Click Generate New Private Key, then confirm by clicking Generate Key.
-
Securely save the JSON file.
Now configure notifications in Sunshine Conversations.
-
Go to the Android integration page.
-
Click the Connect or Configure button.
-
Enter the following using the contents of the JSON service account key file you downloaded above.
-
projectId: A unique identifier for your Firebase project.
-
PrivateKey: A key that Firebase uses for server-to-server communication.
-
clientEmail: The client email address (also called a service account email) associated with the Firebase project.
-
Step 3. Test it out!
-
Kill and restart your app.
-
Launch Sunshine Conversations.
-
Send a message.
-
Press the home button or navigate away from the conversation.
-
Reply to the message from your choice of Sunshine Conversations integrated service.
You’ll receive a notification on the phone!
Localization
Every string you see in Sunshine Conversations can be customized and localized. Sunshine Conversations provides you with a few languages out of the box, but adding new languages is easy to do. When localizing strings, Sunshine Conversations looks for values in the strings.xml in your app first then in the Sunshine Conversations ui bundle, enabling you to customize any strings and add support for other languages.
Adding more languages
To enable other languages beside the provided ones, first copy the english strings.xml file from the Sunshine Conversations ui bundle to the corresponding values folder for that language. Then, translate the values to match that language.
Customization
Strings customization
Sunshine Conversations lets you customize any strings it displays by overwriting its keys.
In order to do so, simply add res/values-<your-language-code>/strings.xml file in your Android project and specify new values for the keys used in Sunshine Conversations. You can find all available keys by browsing to the ui-x.x.x/res/values/values.xml file in the External Libraries in Android Studio.
Dates shown in the conversation view are already localized to the user’s device.
For example, if you wanted to override strings for English, you would create a file res/values-en/strings.xml and include the following in that file:
<resources>
    <string name="Smooch_activityConversation">Messages</string>
    <string name="Smooch_startOfConversation">This is the start of your conversation with the team.</string>
    <string name="Smooch_welcome">Feel free to leave us a message about anything that\'s on your mind.</string>
    <string name="Smooch_messageHint">Type a message…</string>
</resources>Styling the Conversation Interface
Using a colors.xml file in your res/values folder, you can change the colors used by :
<resources>
    <color name="Smooch_accent">#0072EE</color>
    <color name="Smooch_accentDark">#76008a</color>
    <color name="Smooch_accentDarker">#66008a</color>
    <color name="Smooch_accentLight">#be7cca</color>
    <color name="Smooch_accentFailure">#800072EE</color>

    <color name="Smooch_btnSendHollow">#7fc0c0c0</color>
    <color name="Smooch_btnSendHollowBorder">#c0c0c0</color>

    <color name="Smooch_btnActionButton">#eeeeee</color>
    <color name="Smooch_btnActionButtonPressed">#cccccc</color>
    <color name="Smooch_btnActionButtonRipple">#c0c0c0</color>

    <color name="Smooch_header">#a0a0a0</color>

    <color name="Smooch_inputTextBackground">#353535</color>
    <color name="Smooch_inputTextColor">#ffffff</color>
    <color name="Smooch_inputTextColorHint">#bdbdbd</color>

    <color name="Smooch_messageDate">@color/Smooch_header</color>

    <color name="Smooch_conversationBackground">#212121</color>
    <color name="Smooch_conversationListBackground">#212121</color>
    <color name="Smooch_conversationListTextColor">#ffffff</color>
    <color name="Smooch_conversationListTitleTextColor">#ffffff</color>
    <color name="Smooch_conversationListErrorTextColor">#212b35</color>
    <color name="Smooch_conversationListErrorBackgroundColor">#ffffff</color>
    <color name="Smooch_conversationListErrorRetryIconColor">#ff000000</color>
    <color name="Smooch_conversationListTitleTimestampTextColor">#99ffffff</color>

    <color name="Smooch_remoteMessageAuthor">@color/Smooch_header</color>
    <color name="Smooch_remoteMessageBackground">#353535</color>
    <color name="Smooch_remoteMessageBorder">#d9d9d9</color>
    <color name="Smooch_remoteMessageText">#ffffff</color>

    <color name="Smooch_userMessageBackground">@color/Smooch_accent</color>
    <color name="Smooch_userMessageBorder">@color/Smooch_accentDark</color>
    <color name="Smooch_userMessageUnsentBackground">@color/Smooch_userMessageFailedBackground</color>
    <color name="Smooch_userMessageUnsentBorder">@color/Smooch_userMessageFailedBorder</color>
    <color name="Smooch_userMessageFailedBackground">@color/Smooch_accentFailure</color>
    <color name="Smooch_userMessageFailedBorder">@color/Smooch_accentFailure</color>
    <color name="Smooch_userMessageText">#ffffff</color>
    <color name="Smooch_descriptionText">#FFC0C0C0</color>
    <color name="Smooch_unreadBadge">@color/Smooch_accent</color>
    <color name="Smooch_unreadBadgeText">#ffffff</color>
    <color name="Smooch_statusBarColor">#000000</color>
    <color name="Smooch_actionBarColor">#212121</color>
    <color name="Smooch_actionBarTextColor">#ffffff</color>
    <color name="Smooch_errorSnackbarBackgroundColor">#353535</color>

    <color name="Smooch_btnNewConversationBackground">@color/Smooch_accent</color>
    <color name="Smooch_btnNewConversationTextColor">#ffffff</color>
    <color name="Smooch_btnNewConversationIconColor">#ffffff</color>

    <color name="text_helper_color">#a8a8a8</color>
    <color name="text_failure_color">#ff2851</color>
</resources>
If you need to update the image of the Send button, simply add an image with the following name to your drawables:
smooch_btn_send_normal.pngYou can find the original resources by browsing external libraries through Android Studio.
User Accessibility
To ensure compliance with accessibility standards, the SDK has received a comprehensive update that includes numerous enhancements throughout the SDK. One notable change is the addition of 4% transparency for the background colour (Smooch_accent) in the Quick Replies UI component. While this change improves the appearance of the Quick Replies and enhances visibility and accessibility for users, it is important to note that many other UI components have been improved, resulting in a more user-friendly experience overall.
Additionally, as an integrator, you are responsible for providing colours selections that comply with accessibility guidelines to ensure an inclusive user experience.
Menu items
The Android SDK features a tappable menu icon that allows the user to send various message types. The types displayed in this menu can be customized, or the menu can be hidden altogether.
If you want to control this menu, simply override the following resource in settings.xml to the value of your choice:
<string-array name="Smooch_settings_showMenuOptions" type="array">
    <item>@string/Smooch_settings_takePhotoMenuKey</item>
    <item>@string/Smooch_settings_chooseMediaMenuKey</item>
    <item>@string/Smooch_settings_uploadFileMenuKey</item>
    <item>@string/Smooch_settings_shareLocationMenuKey</item>
</string-array>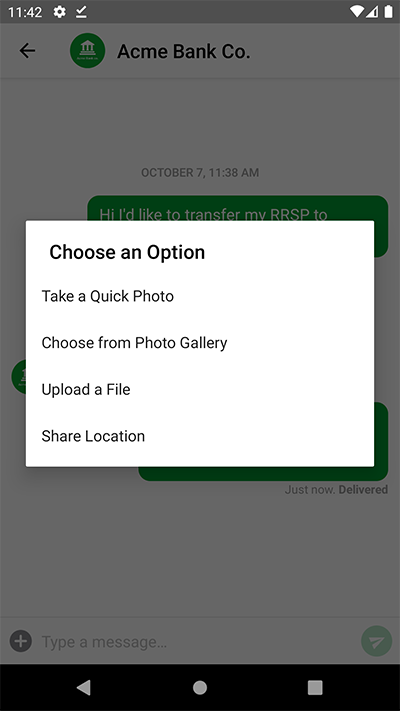
To hide the menu completely, override the resource as follows:
<string-array name="Smooch_settings_showMenuOptions" type="array"/>
Notification Action Intent Override
The default behavior of tapping on a push or in-app notification is to open the Sunshine Conversations ConversationActivity intent.
If you want to change this behavior, simply override the following resource in settings.xml to the value of your choice.
<resources>
  <string name="Smooch_settings_notificationIntent">io.smooch.ui.ConversationActivity</string>
  <string name="Smooch_settings_notificationTriggerKey">trigger</string>
  <string name="Smooch_settings_notificationTrigger">SmoochNotification</string>
</resources>
When launched, the intent will include an extra with the key trigger which can be accessed through intent.getStringExtra. You can override the key / value of this extra if you want. Use this extra to know when your intent has launched as a result of a Sunshine Conversations notification.
@Override
protected void onCreate(final Bundle savedInstanceState) {
    super.onCreate(savedInstanceState);

    String notifTriggerKey = getString(R.string.Smooch_settings_notificationTriggerKey);
    String notifTrigger = getIntent().getStringExtra(notifTriggerKey);

    if (notifTrigger != null && notifTrigger.equals(getString(R.string.Smooch_settings_notificationTrigger))) {
        // Intent was launched by a Sunshine Conversations notif tap
    }
}Notification Channel Settings Override
Apps targeting Android Oreo (SDK 26) or higher will have push notifications delivered to a notification channel. If you wish to override the channel settings for Sunshine Conversations notifications, set the following resources in settings.xml to the values of your choice:
<resources>
  <string name="Smooch_settings_notificationChannelId">your_channel_id</string>
  <string name="Smooch_settings_notificationChannelName">Your Channel Name</string>
</resources>
Starting Text
Sunshine Conversations allows to you to prefill the text box in the conversation when opening it.
To do so, simply supply a startingText string when calling ConversationActivity.show:
ConversationActivity.show(this, "Hi there! Can you help me please?");Extending ConversationActivity
In some cases it may be desirable to use your own custom ConversationActivity in place of the one provided by Sunshine Conversations. One such case is if you want to modify or remove the action bar. This can be achieved if you extend the Sunshine Conversations ConversationActivity.
To do so, do the following:
- Create a new activity that extends
ConversationActivity - Add the “theme to your activity in your
AndroidManifest.xmlfile (or create one which specifies<item name="android:windowActionBarOverlay">true</item>)
At this point, your Activity should look something like this:
package your.package;

import android.os.Bundle;

import io.smooch.ui.ConversationActivity;

public class CustomConversationActivity extends ConversationActivity {
    @Override
    protected void onCreate(final Bundle savedInstanceState) {
        super.onCreate(savedInstanceState);
        setTitle("Whatever You Want");
        getSupportActionBar().setDisplayHomeAsUpEnabled(false);
    }
}
And your manifest should look something like this:
<activity
    android:name="your.package.CustomConversationActivity"
android:theme="@style/Theme.Smooch" />-
When showing Sunshine Conversations in your Android code, instead of calling
ConversationActivity.show(this), callstartActivity(new Intent(this, CustomConversationActivity.class)); -
To ensure the correct activity is launched when a notififcation is tapped, override the setting
Smooch_settings_notificationIntentto provide the full path of your new activity
ex: <string name="Smooch_settings_notificationIntent"><your.package.CustomConversationActivity</string>
Implementing your own User Interface
If you need more customization options than the ones supported natively by Sunshine Conversations, you can implement a complete custom UI by leveraging events and APIs exposed by the SDK, which will continue to facilitate the connection with the Sunshine Conversations platform.
Our sample custom UI project covers the first steps you need to follow to get started.
Permissions
The Sunshine Conversations library includes the following permissions by default:
Ui module:
<uses-permission android:name="android.permission.ACCESS_NETWORK_STATE" />
<uses-permission android:name="android.permission.INTERNET" />
<uses-permission android:name="android.permission.VIBRATE" />
<uses-permission android:name="android.permission.ACCESS_FINE_LOCATION" />
<uses-permission android:name="android.permission.ACCESS_COARSE_LOCATION" />
<uses-permission android:name="android.permission.POST_NOTIFICATIONS" />ACCESS_FINE_LOCATIONis used in order to access the customer’s location when requested using location request buttons.
If you do not intend to request the user’s location at any point, it is safe to remove the ACCESS_FINE_LOCATION using the following override:
<uses-permission android:name="android.permission.ACCESS_FINE_LOCATION" tools:node="remove" />Core module:
<uses-permission android:name="android.permission.ACCESS_NETWORK_STATE"/>
<uses-permission android:name="android.permission.INTERNET"/>
<uses-permission android:maxSdkVersion="28" android:name="android.permission.WRITE_EXTERNAL_STORAGE"/>WRITE_EXTERNAL_STORAGEis required for file downloads on devices running API levels below 29. Please note that if the customer sets a maxSdkVersion different than 28 in their product, it will result in the following:- The app won’t build unless the integrator adds tools:replace=“android:maxSdkVersion”.
- Devices with API levels between the customer’s max version (if it’s lower than the SDK’s max version) and the SDK’s max version will not be able to download files.
All other permissions are necessary for Sunshine Conversations to function as intended.